Plumbing mishaps are a homeowner's worst nightmare, and a leaking toilet is undoubtedly one of the most dreaded issues. If you find yourself grappling with this problem in your Huntington Beach, CA residence, fear not! Follow this detailed guide for an in-depth look at how to effectively repair or replace a malfunctioning toilet. In case water damage has occurred, our dedicated restoration specialists in Huntington Beach are at your service 24/7, ready to provide swift and efficient assistance, regardless of the scale of the disaster. With expertise in water removal and preventing secondary damage, our highly trained teams ensure your home is back in its pristine condition.
Steps to Repair or Replace a Leaking Toilet
For residents in Huntington Beach, California, dealing with a malfunctioning toilet, this guide provides a detailed roadmap to restore your bathroom to its optimal condition, ensuring a leak-free and comfortable living environment. No matter the type of toilet or the severity of the leak, we help you every step of the way:
- Turn Off the Water - Start the process by locating the water shut-off valve, typically found behind or below the toilet, often in a basement. Turning the valve clockwise closes it, preventing any further water flow to the toilet and allowing you to work on the issue without added complications.
- Remove the Water - After ensuring the water is shut off, flush the toilet until all the water has been drained. To guarantee thorough drainage, use a small paper cup to remove any lingering water in the bowl. Remove the tank lid to monitor the drainage there, and employ a rag or sponge to soak up any residual water.
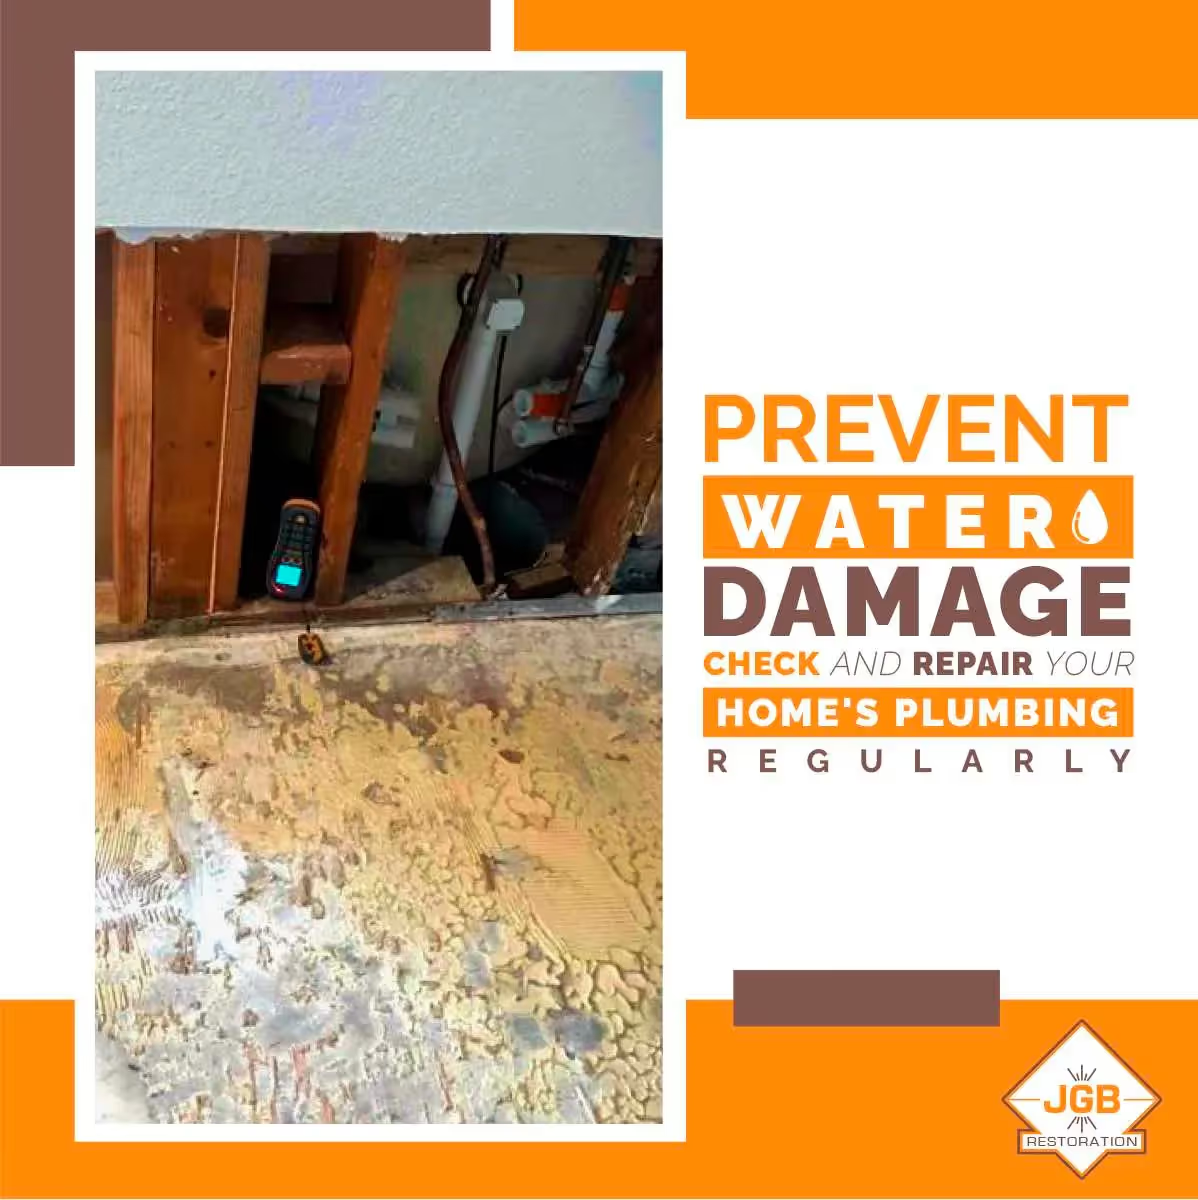
- Diagnose the Leaking Toilet - Identifying the source of the leak is crucial before proceeding with repairs. Common areas of leakage include the base of the toilet, around the tank bolts, or through the tank-to-bowl gasket. Knowing the exact location of the leak guides your repair strategy.
- Repairing the Toilet -
- Base Leaks: Check for a damaged wax ring or flange. If either is compromised, replacing them is essential. Gently rock the toilet to break the wax seal, remove the old wax ring, and install a new one. Ensure the flange is securely fastened to the floor.
- Tank-to-Bowl Gasket and Bolts: Remove the tank from the bowl by detaching the bolts. Replace the tank-to-bowl gasket and bolts if they show signs of wear or damage. Tighten the bolts evenly to avoid over-tightening and potential cracks.
- Tank Bolts: If leaks are identified around the tank bolts, consider replacing the washers or bolts. Apply a thin layer of silicone around the washers for added sealing.
- Reassemble and Test: Reattach the tank to the bowl, ensuring a snug fit. Tighten all nuts and bolts securely but avoid over-tightening to prevent damage. Turn the water supply back on and flush the toilet. Monitor for any signs of leaks and address them promptly if detected.
By following these detailed steps, you can not only identify the source of a leaking toilet but also perform effective repairs to restore its functionality. For the residents of Huntington Beach, California, our dedicated restoration team is always ready to assist in resolving any water damage issues that may arise during the process. Your comfort and peace of mind are our top priorities, ensuring your home remains a safe and pleasant place to live.

.png)